• Main
  • About
  • Books
  • Blog
  • Writing
  • Portfolio
  • Brands
  • Inquiries
Menu

Randwiches

jenn de la Vega || Chef-Stylist & Cookbook Author
  • Main
  • About
  • Books
  • Blog
  • Writing
  • Portfolio
  • Brands
  • Inquiries

Hi, I’m Jenn de la Vega, a cookbook collaborator, caterer, food stylist, and recipe developer. Here you’ll find posts about my latest work and kitchen projects.

Purchase from the affiliate links below to support my work. All sponsored posts are labeled with AD in the title.

What's in my kitchen_.png

Devour My Latest Posts:

Blog
DIECHOTOMY (2024)
about 4 months ago
Portable Music
about 5 months ago
Fun City (2019 - current)
about 7 months ago

Archive:

  • Essay (2)
  • Film (2)
  • Podcast (2)
  • Books (9)
  • News (11)
  • Photographers (12)
  • Guides (28)
  • Events (43)
  • Recipes (71)
Photo by Marjorie Becker

Photo by Marjorie Becker

Float These Crispy Potato Boats

January 07, 2018 in Recipes

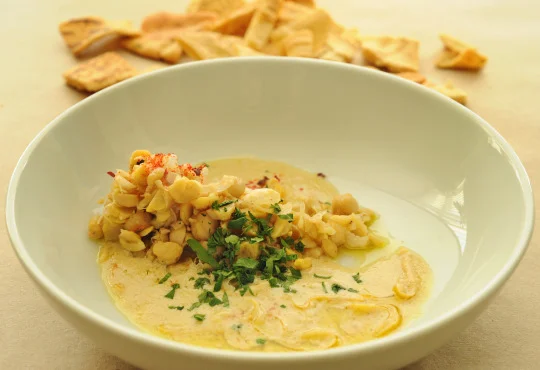
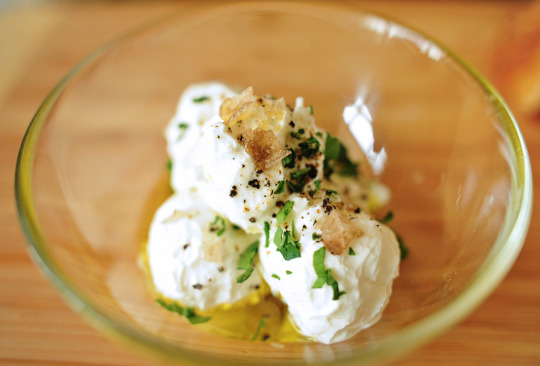
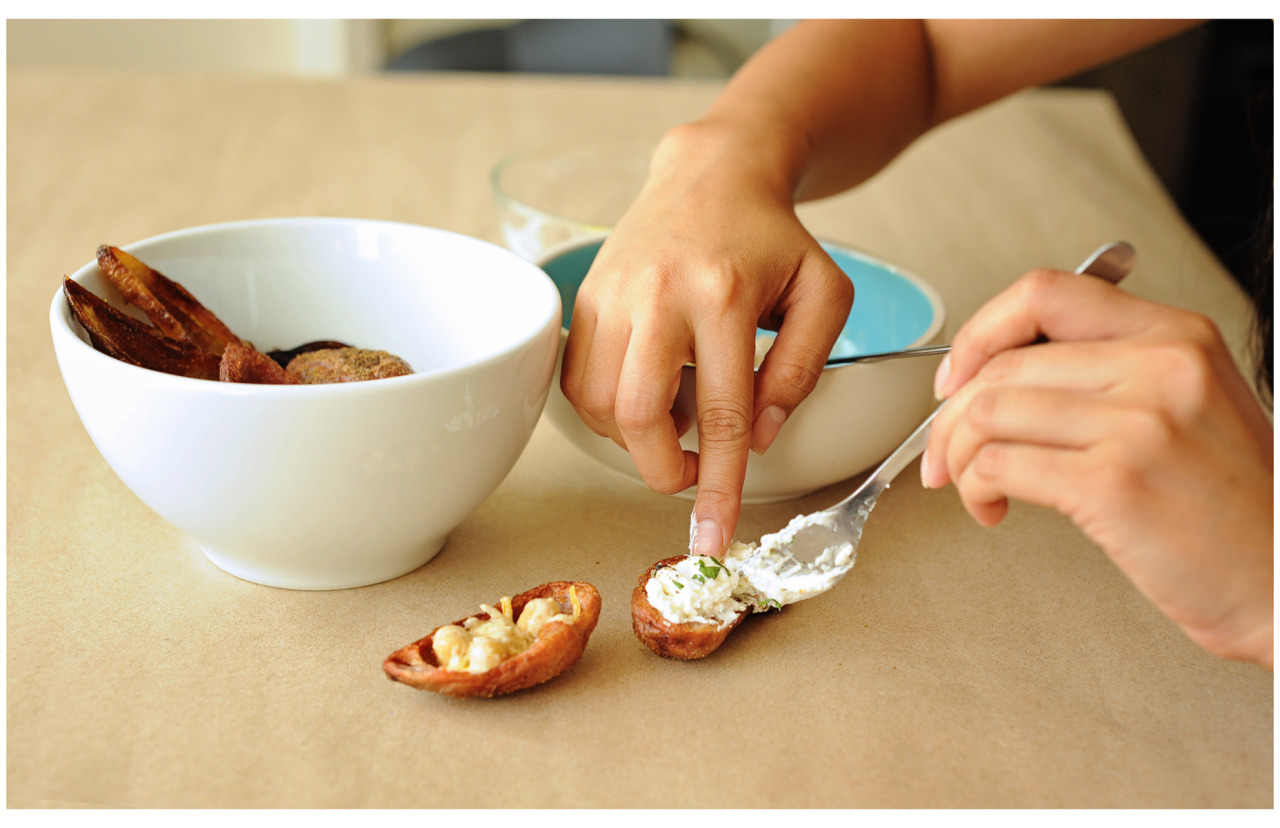
Hands down, my most favorite vegetarian dish I’ve ever had is found on the menu at Glasserie. They are a bowl of crisp, deep-fried potato shells dusted with cumin. Perfect with labneh, stewed chick peas, hummus, or whatever floats your boat.

Things you'll need:
1 pound of fingerling potatoes
3 cups of vegetable oil
1 cup of hummus or filling of your choice
1 teaspoon ground cumin
Salt

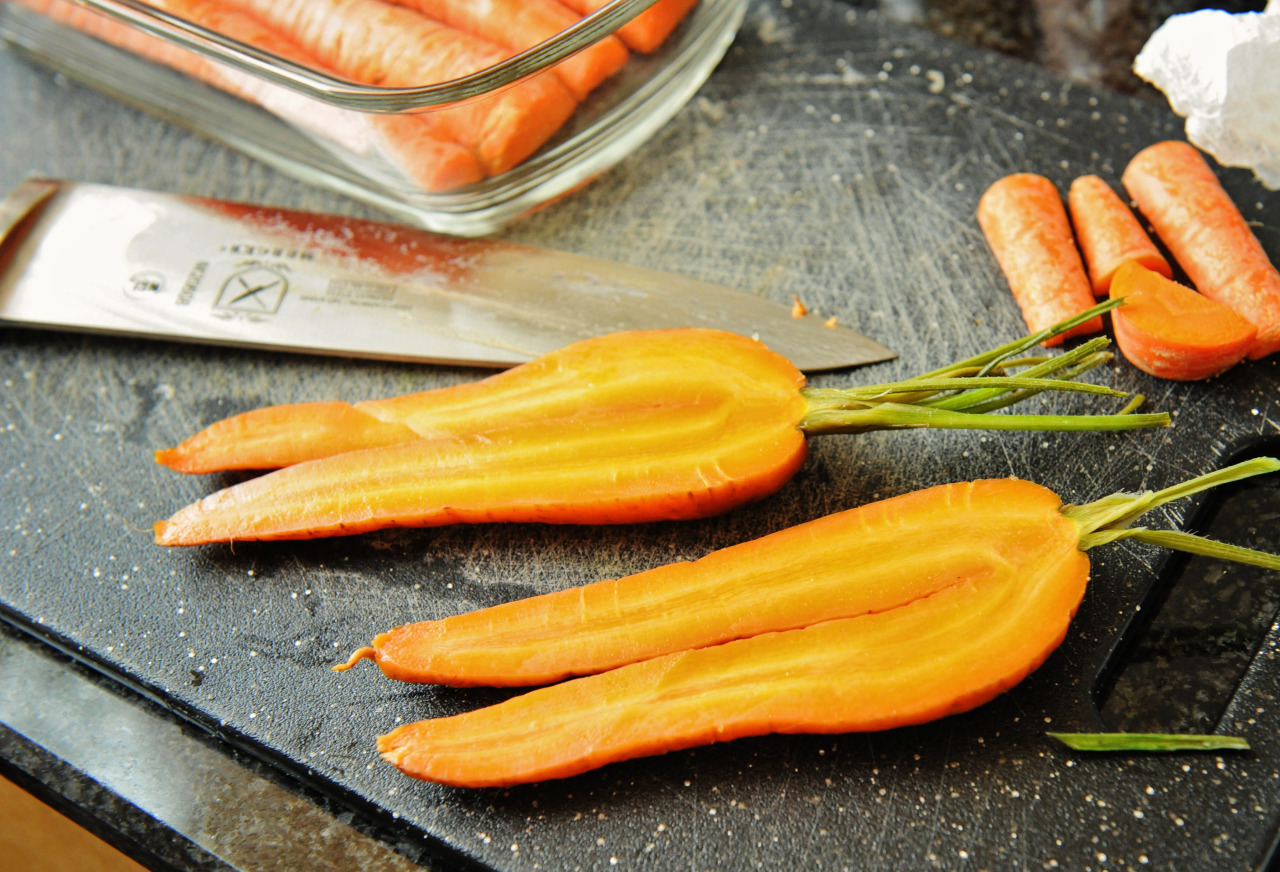
Boil the potatoes until they are fork tender.

Let them cool and split them lengthwise. Scoop out the centers of the potatoes, making sure to leave a few millimeters of margin. Save the scooped potato for another dish.

Turn the oven on its lowest setting and set a pan lined with parchment paper.

Heat up a pot with enough vegetable oil to cover a single layer of potatoes and deep fry on medium heat until they are golden and crisp.

Rest the potato shells on a paper towel to drain the oil. Dust with a little cumin and salt before throwing them in the oven to keep warm. 

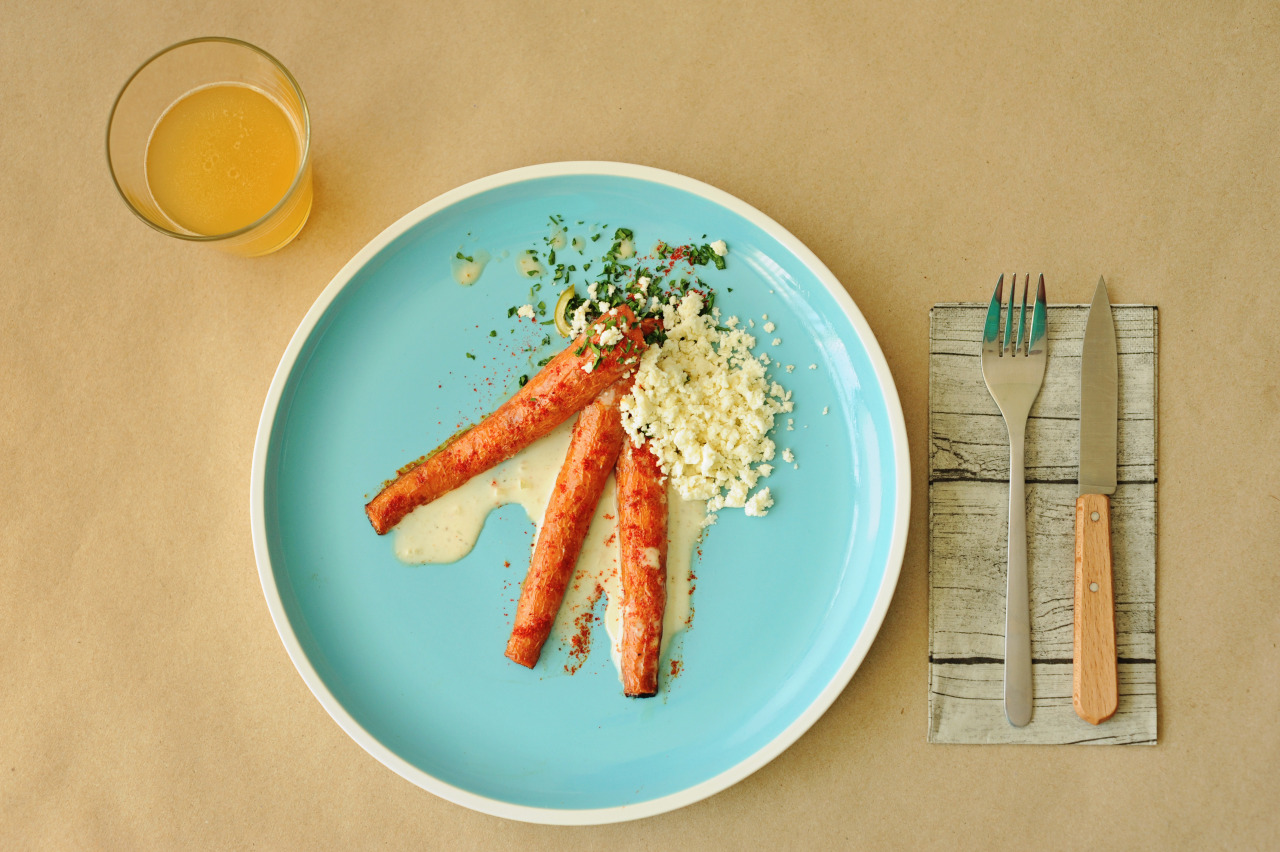
Hum a little sea chanty and fill the boats up before bringing them to ruin (in your belly).

***

Love this? It's part of my Vegetarian Spanish menu.

What floats your potato boat? Tag @Randwiches on Twitter or Instagram.

Tags: Vegetarian
Photo by Marjorie Becker

Photo by Marjorie Becker

Broccoli Grows Up and Gets a Job

January 07, 2018 in Recipes

Oh god, I hated broccoli when I was a kid. And do you blame me? When it is boiled, it can get mushy and smell bad. That's because broccoli is part of the brassica family, where mustard, cabbage, and cauliflower come from. Save the last one, all of those smell pretty awful when you overcook them.  I didn't give it a chance again until I was in college when I had it raw. It was even better when it was roasted or grilled. I've come to love it with a crunchy stalk and crisp leaves.

This dish is exactly that. Vegetarians will find it fun to slice into like a steak and soak the tangy sauce up with the florets.

If you don't wish to use the white bbq sauce listed, try a light sauce Mornay for a grown-up version of broccoli and Velveeta.

Things you'll need:
1 large head of broccoli, split into two
OR 2 small heads

1/2 cup white bbq sauce, from Serious Eats
Olive oil
For the poaching liquid, adapted from Alon Shaya:
1 cup of dry vermouth
OR 1 cup of white wine

1 shot of Grand Marnier
OR sweet liquor

3 cups water
2 tablespoons salt
2 tablespoons butter
1/2 tablespoon red pepper flakes

Preheat the broiler on low.

Bring all of the poaching liquid ingredients to a boil in a pot.

Meanwhile, trim the large stem of the broccoli.  Reduce the heat to a simmer and poach the broccoli for 15 to 20 minutes until the center stem is tender (less time if you like it extra crunchy).

Drain the vegetable well and reserve the cooking liquid for pasta or mussels another time.

Place the broccoli halves on a baking sheet and drizzle each with a bit of olive oil.

Broil for 10-15 minutes until the florets look crispy.

To serve, drizzle the white bbq sauce over the broccoli and make sure to provide a steak knife!

***

Love this? It's part of my Vegetarian Spanish menu.

Let me know if you try it! Tag @Randwiches on Twitter or Instagram.

Tags: Vegetarian
Photo by Marjorie Becker

Photo by Marjorie Becker

Pa Amb Tomàquet: Satiating Toast in a Flash

January 05, 2018 in Recipes

Don't overlook the pa amb tomàquet (tomato toast) when you're in Spain or looking at a tapas menu. It's a humble dish but it is packed with flavor and I argue, it's quintessentially Iberian.

Have it for breakfast or as a snack. Plus, it's cheap to make!

Things you'll need:
3 super ripe tomatoes
1 baguette or any crusty bread
3 cloves of garlic
Maldon sea salt
OR any large flake sea salt
Olive oil

Optional: Slices of Manchego cheese

Cut the tomatoes in half. If the tomatoes aren’t squishy enough to smash with your hand, grate them and save the skins for another project.

Slice a baguette into thirds and then in half lengthwise, you should have six long pieces. For any pullman or rustic pieces of bread, cut slices on the diagonal. Place them on a baking sheet and broil* until the edges are brown and the middles don't squish down when you touch them.

Cut each garlic clove in half. Rub a half garlic clove over each open face of toast. Make sure to press down as if the crispy edges of the bread as if it was a cheese grater, you should have completely disintegrated the garlic. If you do not like the sting of garlic, rub a clove lightly on the face of the bread or opt for roasted garlic.  

When you are ready to serve, smash a tomato onto each slice of bread and spread it around (or spoon if you had unripe tomatoes). Save the skin for another project. Finish with big flakes of Maldon salt and a touch of really nice olive oil. I also like a side of Manchego cheese to remind me of my trip to Spain. It is best enjoyed simply but it wouldn’t be ruined if you added a soft boiled egg.

*Side note about broiling: My roommates and I loved toasting things on the open flame of our stove burners. If you do this, please use tongs, do not wear long sleeves and for the love of god, have a fire extinguisher handy.

***

Love this? It's part of my Vegetarian Spanish menu.

What kind of toasts do you like for breakfast? Show it off and tag @Randwiches on Instagram.

Photo by Marjorie Becker

Photo by Marjorie Becker

Carrot Elote is the Vegetarian Entree You've Been Seeking

January 05, 2018 in Recipes

Elote is one of my favorite Mexican street foods. It's fun to walk around with a large ear of corn on a stick, slathered in crema, crumbly parm and a kick of cayenne. My cheeks would be covered in the powder.

The 'carrot elote' at Xixa is genius. Instead of a messy ear of corn, it's tender, roasted carrot you eat with a fork and knife. This classy spin on elote is quite easy to replicate at home. It can be served as small as one carrot for tapas or a whole platter for Thanksgiving. If you’ve an aversion to spiciness, try paprika instead of cayenne pepper.

Things you'll need:
2 pounds carrots, tops removed
1/4 cup olive oil

1/2 cup Mexican crema
OR mayo thinned with a splash of vinegar
1/2 cup queso fresco
OR cotija or grated parmesan

Cayenne pepper or paprika
2 tablespoons fresh oregano or parsley, chopped
Salt
  1. Preheat the oven to 400 degrees F.

  2. Split carrots lengthwise.

  3. Roast them in olive oil, cut-side down until the edges are brown and they are fork tender, approximately 10 to 15 minutes. You don’t want them to get too soft, so turn off the oven or keep them in the dish on the stove until you are ready to eat.

  4. Spoon crema onto a plate and layer on the carrots.

  5. Smatter the cheese and cayenne pepper directly on top or on the side.  

***

Love this? It's part of my Vegetarian Spanish menu.

Did you give it a try? I want to hear how it went. Tag @Randwiches on Instagram or Twitter.

Tags: Vegetarian
Photo by Marjorie Becker

Photo by Marjorie Becker

Deconstructed Hummus is a Textural Marvel

January 05, 2018 in Recipes

I’ve seen a lot of hummus recipes and I don’t even think this one is perfect but it’s a fun exploration of texture. An amalgam of Ottolenghi and Alton Brown, I give you a lemony dip for pita, chips, topping potatoes or a salad.

NOTE: Misha Bader pointed out that this dish is called musabaha, or chickpeas with hummus. It can be served warm for breakfast with radishes and soft pita. 

Things you'll need:
1 15.5oz can of chick peas
OR 1 cup of dried chick peas, soaked overnight

2 cloves of garlic, peeled
1 lemon, zest reserved
1/4 cup plus 1 tablespoon olive oil
1/2 cup tahini
1/2-1 cup of ice water
Parsley
Chili powder or paprika
salt

Start with a can of drained and washed chickpeas. If you have the time,  soak a bag over night and slow cook until tender.

Rough chop ½ cup of chick peas with a clove of garlic and set aside. In a food processor, pulse and whirrrrr juice of one lemon (keep the zest!), tahini, the rest of the chick peas, garlic, and drizzle in ¼ cup of olive oil. Keep the machine running and pour in ice cold water until the mixture is smooth but thick enough to run off the back of a spoon like condensed milk. Season with salt as necessary.

In a bowl: Spoon in a bit of liquid chickpea mixture, pile on the chunky chick peas; pour a small outer ring of olive oil, and finish with a sprinkle of parsley, lemon zest, chili powder. 

I think a touch of roasted chickpea husks for crunch might do the trick next time!

***

Love this? It's part of a Vegetarian Spanish menu.

Have you tried this recipe? Take a photo and tag @Randwiches on Instagram.

Tags: Vegetarian
Photo by Marjorie Becker

Photo by Marjorie Becker

Magically Cure Vegetables with a Winter Nukazuke Party

January 04, 2018 in Recipes, Guides

When I was working in Dumbo, I joined the Dumbo CSA. Even though I split my share with another person, it was still difficult to keep up with the sheer amount of vegetables I got every week. I needed a way to boost the longevity of my stock! 

Nukazuke was the perfect solution because the pickles take 8 to 12 hours to cure and they’re still a bit crunchy afterward (so you can still cook with them!). It is a Japanese method of pickling with fermented bran, beer and miso, it smells like baking bread. Nota bene! When you start a nuka, it's like a pet. You have to stir it every morning and night. If I knew I wasn't going to be home in time, I would text my roommates to, "Stir the bitch!"—much like Anthony Bourdain’s story of sourdough starter from Kitchen Confidential. In a similar way, you can pass on a cup of nuka to a friend to begin their own crock.  When it starts to warm up, it may attract bugs. If you have to leave home for a day or two, store it in the freezer. I've read that some people store theirs completely in the fridge to keep vermin out, but they will take double the time to cure. 

Whenever I have company over, I make them try every single pickle or make them a tub of my own version of mixed pickle. In some parts of Asia, namely India, “mixed pickle” is a jar of spicy cured lemon, lime, mango, onion, carrot, cauliflower and fenugreek. Because my nuka pickles or tsukemono are already cured with miso and salted, I just chop them up and cover them with a really buttery olive oil. I highly recommend the Barbera Sicilian evo from Fairway.

Photo by Marjorie Becker. Pictured: carrot legs, radishes, garlic scape, asparagus, onion, scallion, and green bean.

Photo by Marjorie Becker. Pictured: carrot legs, radishes, garlic scape, asparagus, onion, scallion, and green bean.

Things you'll need:
1-gallon crock
2 pounds oat bran
2 1/2 cups filtered water
3/4 cup Hitachino beer, warm
3/4 cup sea salt
1 jalapeno
1 bulb of garlic, peeled
1/4 cup white miso
1-inch piece fresh ginger, diced
1 large carrot
2 cups of hearty vegetables, no leaves or soft skins

Adapted from Serious Eats post about 'Mastering Fermentation' by Mary Karlin

Start by toasting the oat bran in a dry pan. While that is happening, combine the water, beer and salt in the crock. Once you smell the toastiness of the oat bran, cool it off. Mix it into the crock with the white miso, it should form a sand-like paste.

Slice up the jalapeno and nest it at the bottom of the crock, bury it in the sand with layers of garlic clove and ginger. Make sure none of the vegetables stick out. Wipe down the sides and cover the whole thing with a cheesecloth and store it in a cool, dark place. And then, wait three days (I know! That's the worst part!).

When the nuka is ready, bury chopped up vegetables in it and unearth them in 8 to 12 hours. Swish them around in a cold bowl of water to clean them and that's it, they're ready! Make sure to taste each kind of vegetable, thicker cuts will take longer. When you take the vegetables out every morning, give the crock a good stir and wipe the edges down so you don't promote mold growth on the sides.

I always like to include a jalapeno and a few garlic cloves in each batch because they will naturally keep the sand clean. Plus, the miso-cured jalapeno kinda tastes like nachos!


Photo by Marjorie Becker


Photo by Marjorie Becker

A word about my ba-donk a donk carrots! At the Dumbo CSA, you walk along the bins and pick out the vegetables that you want. When I saw this pair of gams, I had to grab them. You can’t just chop these up and throw them in a stew (are you CRAZY?). These are a pair of CARROT LEGS! I wanted them around in my kitchen for as long as possible to show people when they came by, “Look, look at these little stumps! No, we’re not eating them…”

When I was a kid, I did this odd thing with a pack of Sweet Tarts. I loved the blue ones and would hide them in my Barbie jewelry box for a time when I’d had harvested enough to have an all blue Sweet Tart party with myself. Alas, the insecure packaging made them disgustingly chewy. Thus proving the Vanessa Williams song wrong: No, you shall not save the best for last. These carrots were getting a little cellulite with every passing day and I had to do something.

The whole carrot bathed in the nuka for 12 hours and rinsed it in cold water to wash off the sediment. Because it is such a special carrot, I had to prepare it in a different ways. I split the legs down the middle for a chorus line of Daucus carota. One pair danced into the oven with olive oil until the edges were a little brown. With so much salt and miso in the cure, there was no need to season or sauce. 

Alternate blog post titles considered:

  1. My carrot’s too bootylicious for ya, babe
  2. She had carrot-dumps like a truck truck truck / Thighs like what what what
  3. Fat bottomed carrots make the rockin’ world go ‘round
  4. Dance! Too much carrot in the pants
  5. OMG Becky, look at her carrot
  6. All you brothas want a carrot girl,carrot girl, carrot girl (who, me?)
  7. Hoe, who is you playin wit? Back that carrot up

***

Love this? It's part of a romantic Spanish vegetarian menu. 

Have you ever tried nukazuke? What is your favorite kind of pickle? I want to know! Tweet me @Randwiches.

Tags: Pickling, Vegetarian
Photo by Marjorie Becker Shah

Photo by Marjorie Becker Shah

A Romantic Spanish Cheeseboard You'll Need to Share

January 04, 2018 in Photographers

I miss Barcelona. I love the tapas way of life because I'm a snacker and don't like to commit to large meals. Manchego is pretty much on every menu you find. Labneh is available in some stores but you can make it yourself. I have a recipe in my cookbook but it is essentially strained yogurt.

Transport yourself with this Spanish-inspired board, pop open a bottle of dry cider or a nice sparkly Txakolina.

Things you'll need:
1 cup of labneh
1/4 pound Manchego
1/4 pound Danascara Dulcinea
1/4 cup of Marcona almonds
2 tablespoons apricot jam
1/2 boule, cut into wedges
1 tsp fresh parsley
1 donut peach, sliced
Small bunch of dandelion greens
Smoked Maldon sea salt

Roll the labneh into balls then top it off with pepper, parsley and smoked Maldon salt. Since they are quite sticky, I opted for a small glass bowl to not directly muck up the cheeseboard.

Danascara Dulcinea is a domestic impersonation of Manchego. It's matched in style but is finished with a rubbing of cocoa and olive oil. To accompany, I found the dregs of an apricot jam and mixed it with ground pepper and parsley; marcona almonds, dandelion greens, a donut peach and fat wedges of SCRATCH Bread cacio e pepe.

***

Love this? It is part of a romantic Spanish vegetarian menu.

Show me your cheeseboards! Tag @Randwiches on Instagram and I'll take a peek.

Tags: Cheese
Marjorie-Becker-Badonk.jpg

An Attractive Vegetarian Spread That Fervent Carnivores Will Love

January 04, 2018 in Photographers

Through my various careers, I've gotten to meet so many different kinds of creative people and photographers. I remember meeting Marjorie Becker for the first time at a concert that I curate called Pulsewave. She takes photos of bands, sometimes dogs (now food!) —and miraculously has all of the photos up and edited early the next morning! Back in 2014, we met up in her Upper West Side apartment with tons of light. It was great to have a visual history of everything I’ve worked on and I stumbled upon the collection again.

Marjorie is vegetarian. When you’re a hardheaded meat eater like me, it’s very easy to give a vegetarian a bunch of sides and call it a night. Luckily, I’ve been practicing and found inspiration from local Brooklyn places like Glasserie and Xixa, which I praise for having “omnivore” menus. 

Marjorie-Becker-Badonk2.jpg Marjorie-Becker-Broccoli.jpg Marjorie-Becker-Elote.jpg Marjorie-Becker-Goat-cheese.jpg Marjorie-Becker-Manchego-platter.jpg Marjorie-Becker-Pan.jpg Marjorie-Becker-Pita-Chips.jpg Marjorie-Beckers-Potato-boats.jpg

I present to you a lovely menu of vegetarian dishes that even dedicated meat-heads will devour:

  • Manchego & labneh board
  • Fried potato boats
  • Deconstructed hummus
  • Pa amb tomàquet
  • Carrot elote
  • Nukazuke pickles
  • Broccoli with white bbq sauce
Tags: Cheese, Pickling

South of the Border Hack: DIY Spicy Crunchwrap Supreme

October 22, 2017 in Recipes

I confess, I never actually ate one of the crunchwrap supremes at Taco Bell. I took one look at a photo of it and searched for the ingredients online. Ever since my DIY M-egg-ican pizza post, I've been wanting to recreate more Taco Bell items at home. 

What you'll need
1 pound of ground beef
1 packet of taco seasoning
(or 1 teaspoon cumin, paprika, pepper, salt to taste)
1 bunch of arugula, washed and chopped
1 tomato, chopped
1 small bag of Flaming Hot Cheetos
Sour cream
22oz bag of shredded cheese 
4 burrito sized tortillas
Cast iron press

Start by sauteeing the ground beef in a dry pan over medium heat, it will have enough fat to fry itself. Break up the clods of meat with a wooden spoon until it is granular and has turned from pink to thoroughly brown. Pour off the beef fat into a small bowl for our beef queso.

Empty the taco seasoning onto the beef and toss off the heat. Set aside.

IMG_6170-Beef.JPG

Make a half batch of the Cook's Science beef queso with the fat you have in a bowl. Alternatively, if you don't have sodium citrate, toss half the pack of shredded cheese in a tablespoon of cornstarch and gradually stir into a simmering mix of the beef fat and 1/2 cup of water. Whisk until smooth.

Working 1 tortilla at a time, scoop 1/4 cup of cooled ground beef into the center. Layer on queso, tomato, arugula, shredded cheese, sour cream and optional Flaming Hot Cheetos. Fold the tortilla over the mixture, it's ok if it's a little uneven. Make sure the flaps stay closed.

On medium heat, press the tortilla seam-side down so you can secure it closed. Use a cast iron press or heavy pan to weigh it down. Cook for 2-3 minutes until the tortilla is brown and crispy. Flip it over and repeat.

IMG_6202-cast-iron-press.JPG
IMG_6207-sear.JPG

From here, you can wrap it in foil and hand it to someone (or yourself to eat). But since I'm a tiny bb and can never finish a burrito (because that is essentially what this is, but flat), I cut it in half and saved a bit for later.

I was skeptical about the Cheetos staying crispy but they were! Next time, I don't layer them directly onto the sour cream for more legit crunch in crunchwrap. Added bonus! It reheats very well. I kept it wrapped in foil to warm it through and then put it on the direct pan to recrisp the outside.

IMG_6244-reheated.JPG

In conclusion, I'm fascinated that Taco Bell has popularized this format of tortilla folding. I highly recommend stuffing it with other things, it makes barely any mess. It's warm, comforting and fun to eat. 


Have you tried this recipe? Tag me @Randwiches on Instagram to let me know. What other Taco Bell hacks do you want to see? Tweet your requests to me!

Tags: Taco Bell
Photo by Kelly Sweda, http://www.kellyswedaphotography.com/

Photo by Kelly Sweda, http://www.kellyswedaphotography.com/

Beacon, NY Mezze-scape Photographed by Kelly Sweda

July 18, 2017 in Photographers
Photo by Kelly Sweda

Photo by Kelly Sweda

SFK and Jen asked me to cater their wedding. As much as I clamor to say yes to every opportunity to make food for my friends, I had a few logistical obstacles in the way. Instead, we decided to collaborate on an appetizer spread for 50 people while another local caterer handled the main event. 

We covered a patio table with butcher paper and I set out to style an epic Mediterranean tablescape that would be easy serve as well as clean up when we were done.  Paired with plates from the dollar store and vintage pic-a-nic baskets, we had waves of snacks sweeping across the surface. Bonus: everything was vegan except for the cheese board.

Our menu:

  • Lemon hummus
  • Sherry vinegar marinated garlic scapes & mushrooms
  • Pickled carrots with Peppadew 
  • Orange pecan dukkah
  • Labneh
  • Olives
  • Crudités, fresh from the McCarren Farmer's Market
  • Cheese board

Photos by Kelly Sweda


I wrote "All the Feels (and foods)" for Brooklyn Magazine's Home & Design issue, on stands now. It's about navigating the complex web of emotions that go with wedding catering.

If you'd like to explore working with me on your next party, I'm booking for 2018.

Tags: Weddings, Photography, Vegan, Vegetarian
Newer / Older
Back to Top

Randwiches by Jenn de la Vega 2023